How to add and edit restaurant menus on your Google Business Profile
Learn how to add and edit menus on your Google Business Profile with this comprehensive guide. Step-by-step instructions make it easy for anyone to get the job done!
Think about the last few times you searched for a local business online. As restaurants are the most searched type of business on Google and other major search engines, there is a very good chance that one of your more recent online searches was for someplace to go out to eat.
So restaurant owners must leverage the power of search engine optimization (SEO) to maximize Google visibility and draw diners to their doors. In fact, if you own a restaurant and you haven’t optimized your presence on Google you are almost certainly losing money to your closest competitors.
When internet users make restaurant searches on Google, three out of four of them look at a menu. This makes a Google menu posting an incredibly useful tool for online marketing outreach and SEO.
But just like menus themselves, no two Google menu posts are created equally. Read on to learn not only how to add a menu to your Google Business Profile but to edit and optimize it for maximum success.
Step 1 – Ensure that your business qualifies for a menu post.
The Google platform doesn’t allow just any business access to the menu display feature on its Business Profile. Any business that signed up for a Business Profile as a restaurant, however, should be able to access the feature with ease.
Your ability to feature a menu on your Google Business Profile depends on the category you selected when you first signed up for it. In addition to those who selected “restaurant,” business owners who selected “bar,” “cafe,” or “club” for their Business Profiles can also display a menu.
If your business doesn’t clearly fit into one of the above categories, don’t try to change your category to force access the menu display function. This places your Business Profile at risk of an official suspension by Google.
Step 2 – Create a menu for your business.
Eligible business owners can use virtually any Internet-connected computer or mobile device to add a menu to a Google Business Profiles to conveniently display the food and drink items that they serve. The process is extremely simple:
- On the main page of your Business Profile, locate the toolbar above the search results field
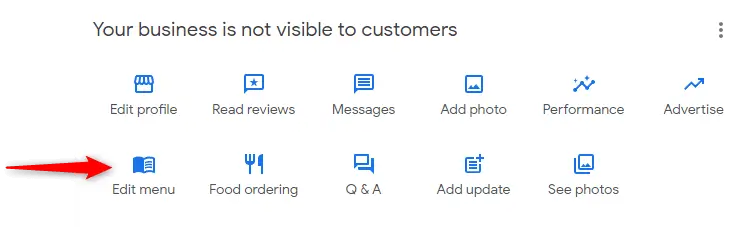
- Select “Edit profile > Menu.”
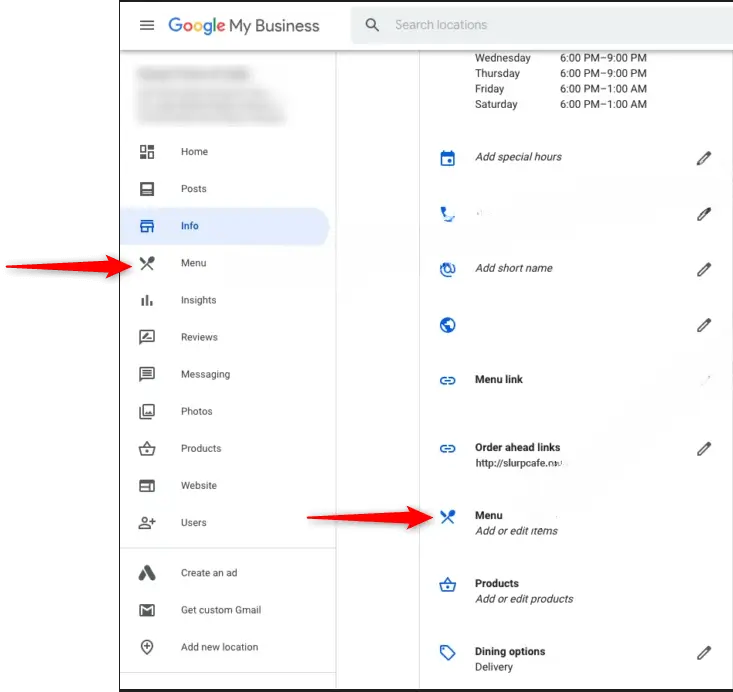
- Some users might find a “Copy” option that allows them to copy and update existing menu data from another menu source.
- To create a menu from scratch, select each menu item and section title that you want to include as follows:
- Add a menu item by selecting “Add menu item,” entering your item information, and then selecting “Save.”
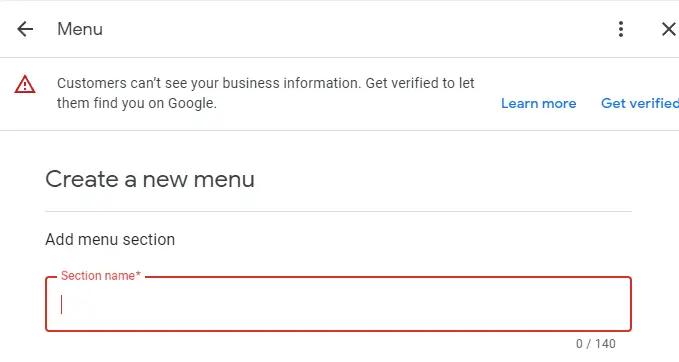
- Add a menu section by selecting “Add menu section” and entering the section name of your choice. Before saving the section by selecting “Save,” you must input at least on menu item for that section.

Your Business Profile gives you the opportunity to attach prices and descriptions to each menu item you post. Keep these menu items organized and easy to find by grouping them into sections such as “appetizers,” “drinks,” “main courses,” and “desserts.” After you complete your menu post, customers will be able to find and access it by selecting the “Menu” tab on your Business Profile.
Step 3 – Add menu photos.
After selecting “Menu,” customers can also view a range of menu-related photos on your Business Profile. Business owners and customers alike can add a photo of your menu through the Google platform.
To add a menu photo from your Business Profile…
- Locate the toolbar above the search results field.
- Select “Edit > Photo.”
- Upload a clear photo (or a series of clear photos) of your menu.

Step 4 – Optimize your menu post for maximum success.
As a responsible business owner, you should ensure that every menu photo on your website reflects your actual menu and is of high quality. If you see a customer-uploaded menu photo that’s obsolete or unclear, you flag it for removal by a Google official. After uploading a photo of your updated menu, you can remove any outdated menu photo by…
- Selecting “Your photos > “By owner.”
- Selecting the specific photo you want to delete.
- Selecting “Trash” in the top right of the screen and then confirming that you want to delete it.
It is also extremely important to optimize your menu items and their descriptions to capture the attention of the consumers who read them and optimize them for SEO purposes. Although including relevant keywords in your descriptions is essential for effective SEO, you also want to take care not to overstuff or “spam” your menu content as this may damage, rather than boost, your SEO efforts.
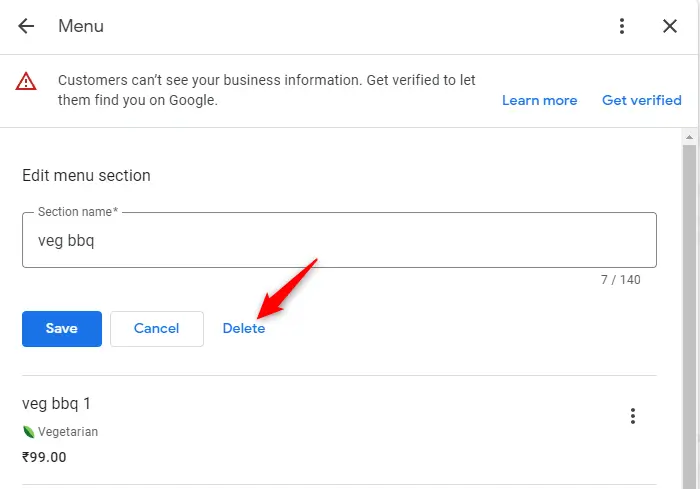
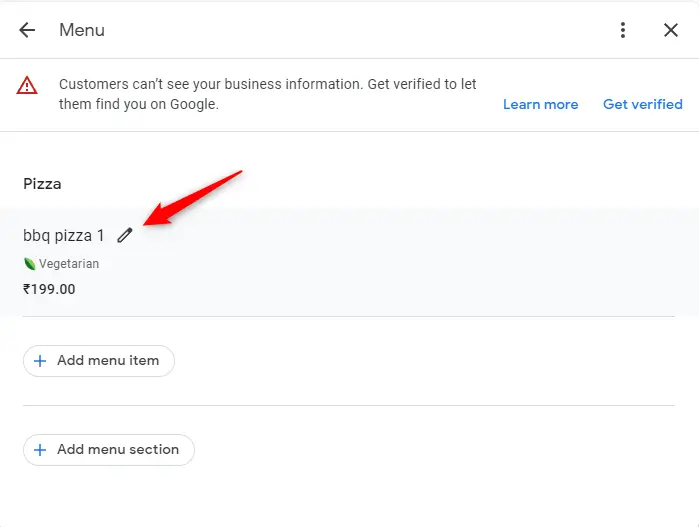
To edit the menu on your Google Business Profile, select “Edit profile > Menu.” Then, to…
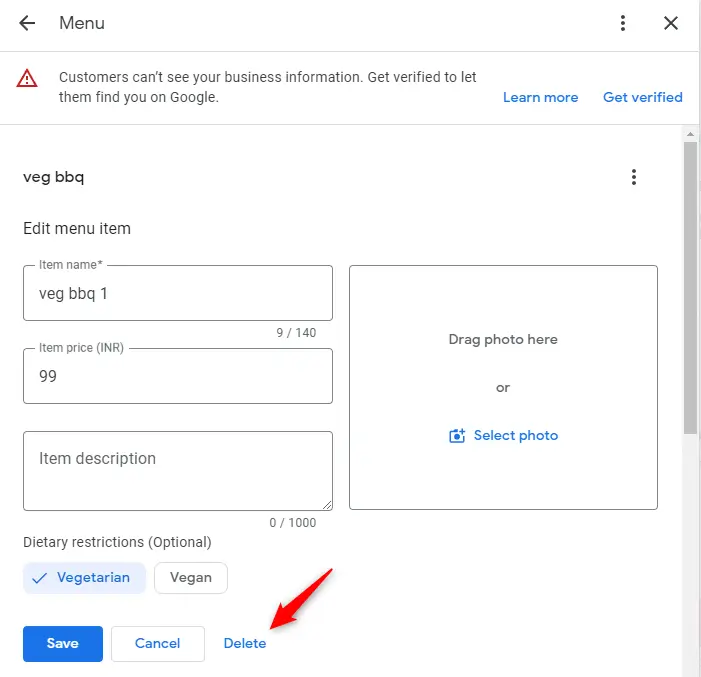
- Edit a menu item or section, enter your changes and select “Save.”

- Delete a single menu item, select “Delete > Delete” at the bottom of the item.
- Delete a section and all its menu items, select “Delete” at the bottom of the section then confirm that you want to delete the selected menu section and all of its items.