Get Listed on Facebook Places / Claim Facebook Locations
Learn how to create and manage multiple store locations on your Facebook Business Page. This guide walks you through everything you need to set up and manage Facebook Location Pages effectively.
To manage multiple locations on Facebook, you first need a solid business page as your foundation. If you do not have one yet, start with our step-by-step guide: How to Make a Facebook Business Page | Synup.
Facebook now handles all business location listings through Meta Business Suite. That means you can add and manage locations directly from Business Manager instead of creating separate Places listings.
For multi-location businesses, Facebook’s Locations feature is a game-changer. It lets you create individual store pages (“child pages”) that all roll up into one central brand hub (“parent page”). This gives you cleaner management, stronger brand consistency, and local SEO rankings for every store you operate.
How to Create Multiple Locations on Facebook
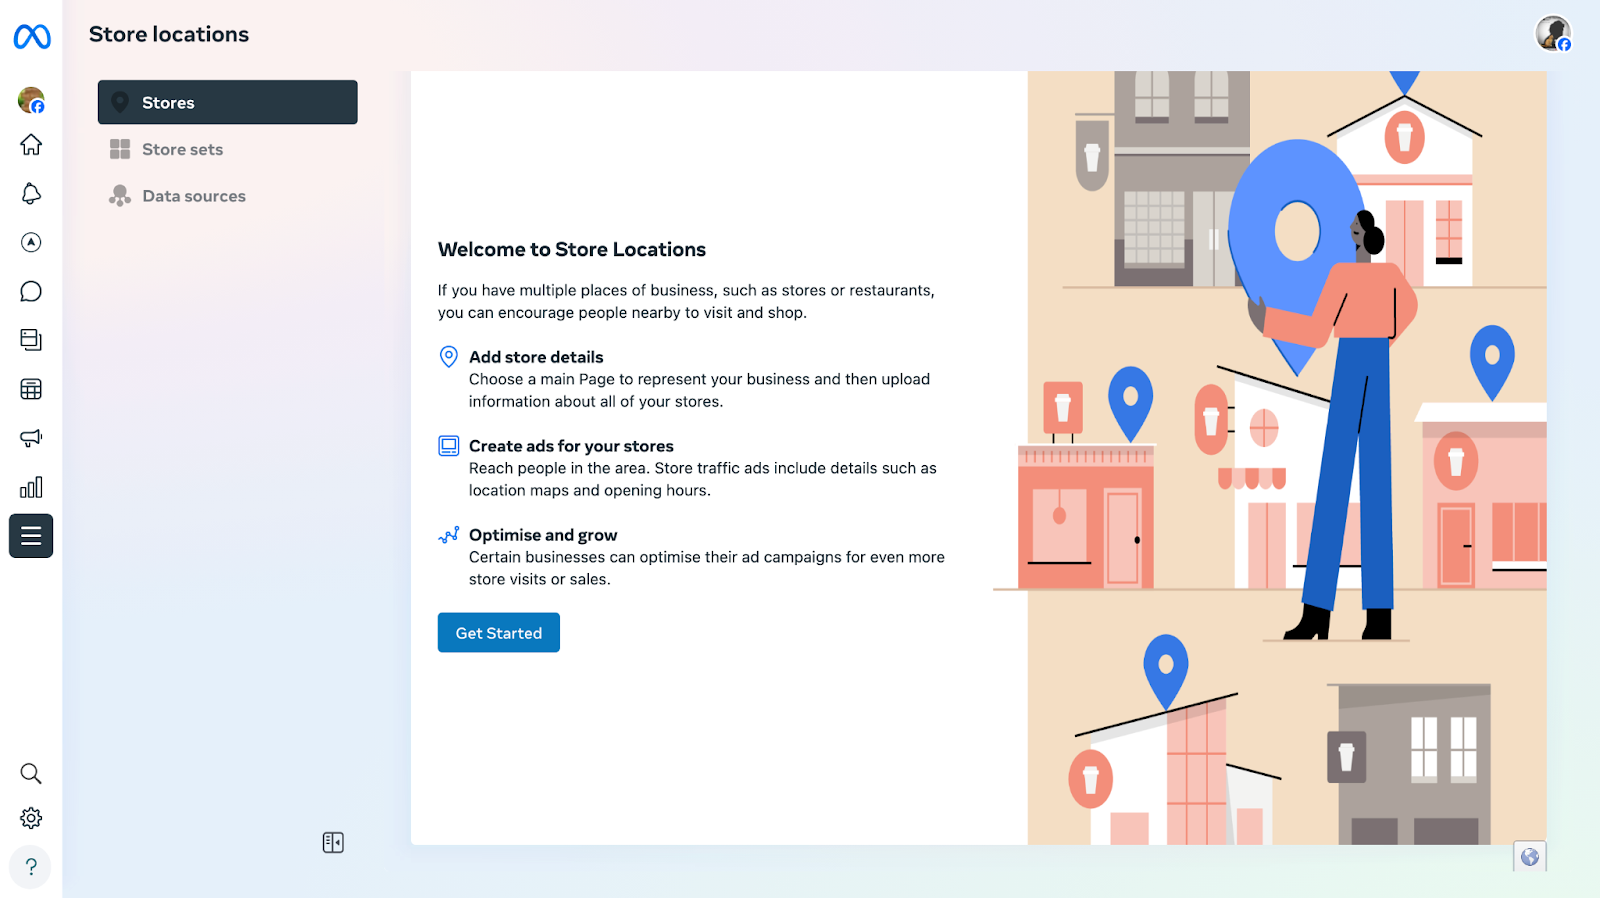
Step 1: Access Facebook Business Locations
Log in to Facebook. You need to be an admin or editor to add locations. This can be checked in Settings > Page Roles.
Navigate to Business Manager > Assets > Business Locations.
Otherwise, go directly to: https://business.facebook.com/business_locations/

Step 2: Convert Your Main Page to a Parent Page
Click “Get Started” on the Business Locations page. Choose your Facebook Business Page from the dropdown menu.
Facebook requires your main business page to represent the brand only, without an address. If your main page currently has an address, remove it. Otherwise, Facebook will automatically convert that address into your first location page.
During this process, Facebook will also ask whether you want to move your existing reviews or hide them. You will see a warning prompt. Click Next to continue.
Step 3: Add Your Store Locations
Once conversion is done, go to the Stores dashboard and click Add Stores.

You can now add locations manually. You’ll need to enter:
- Store Number
- Location Descriptor
- Full Address
- Phone Number
- Business Hours
Facebook autofills the business name using your parent page. You can also adjust later.
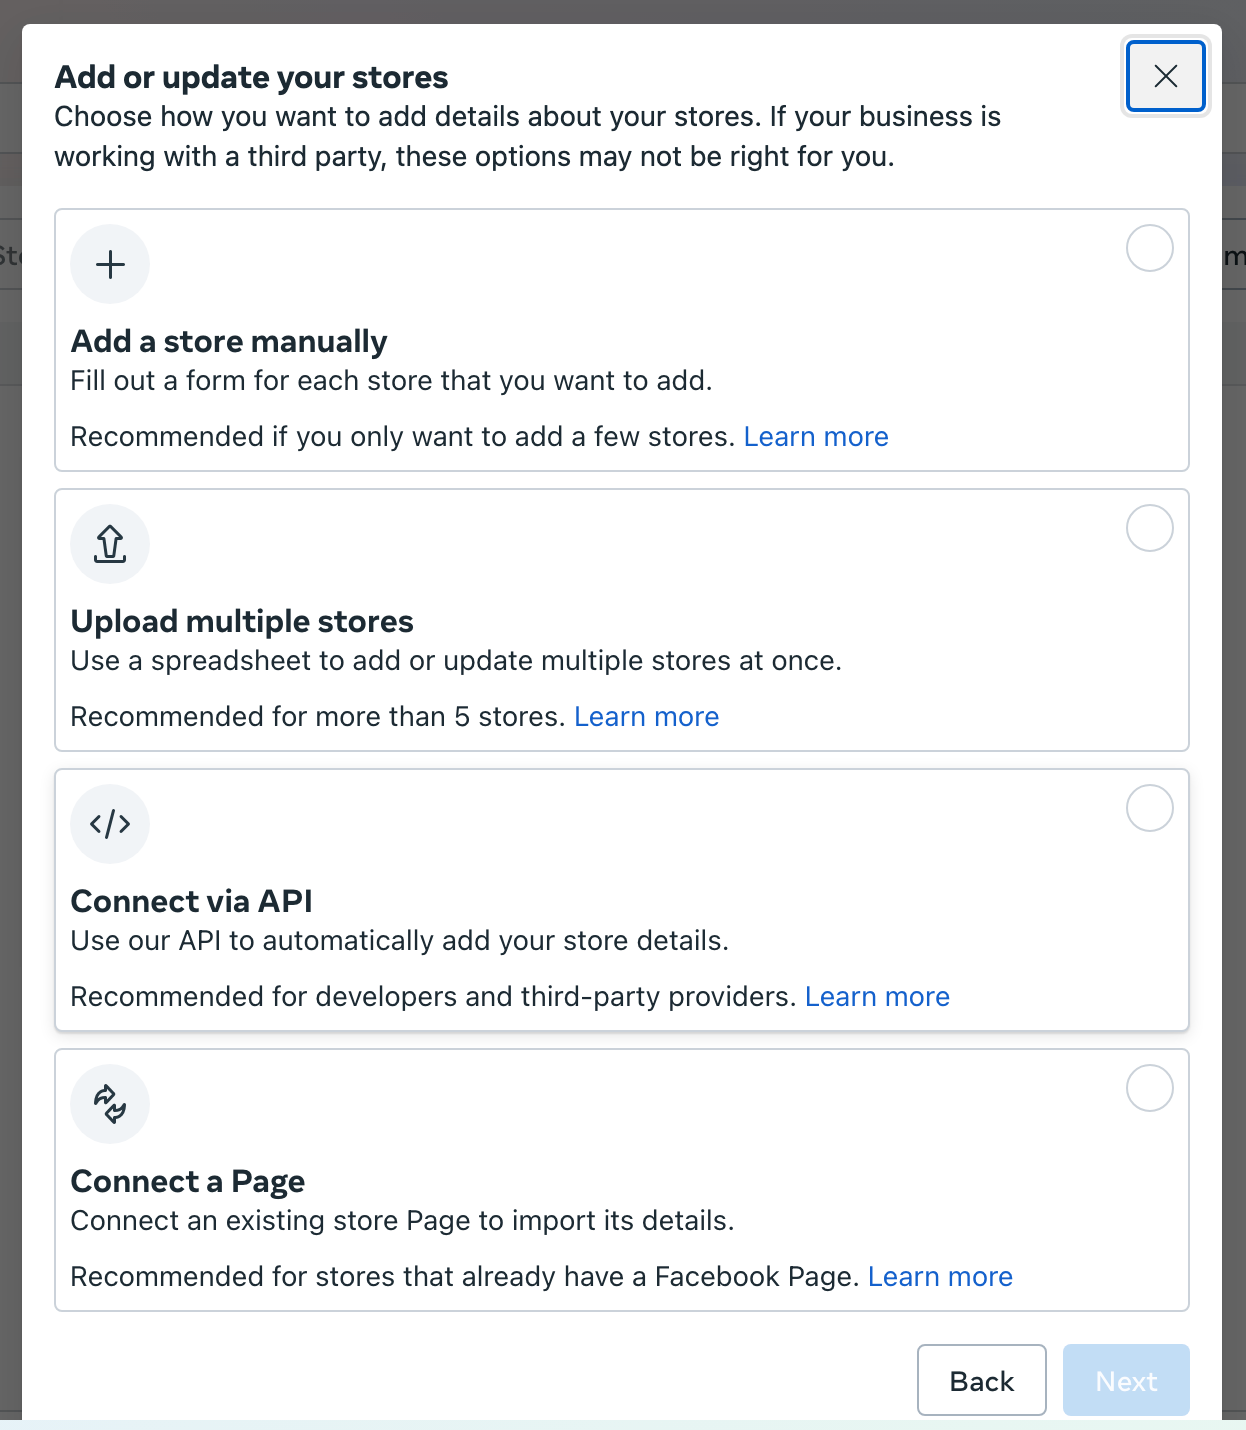
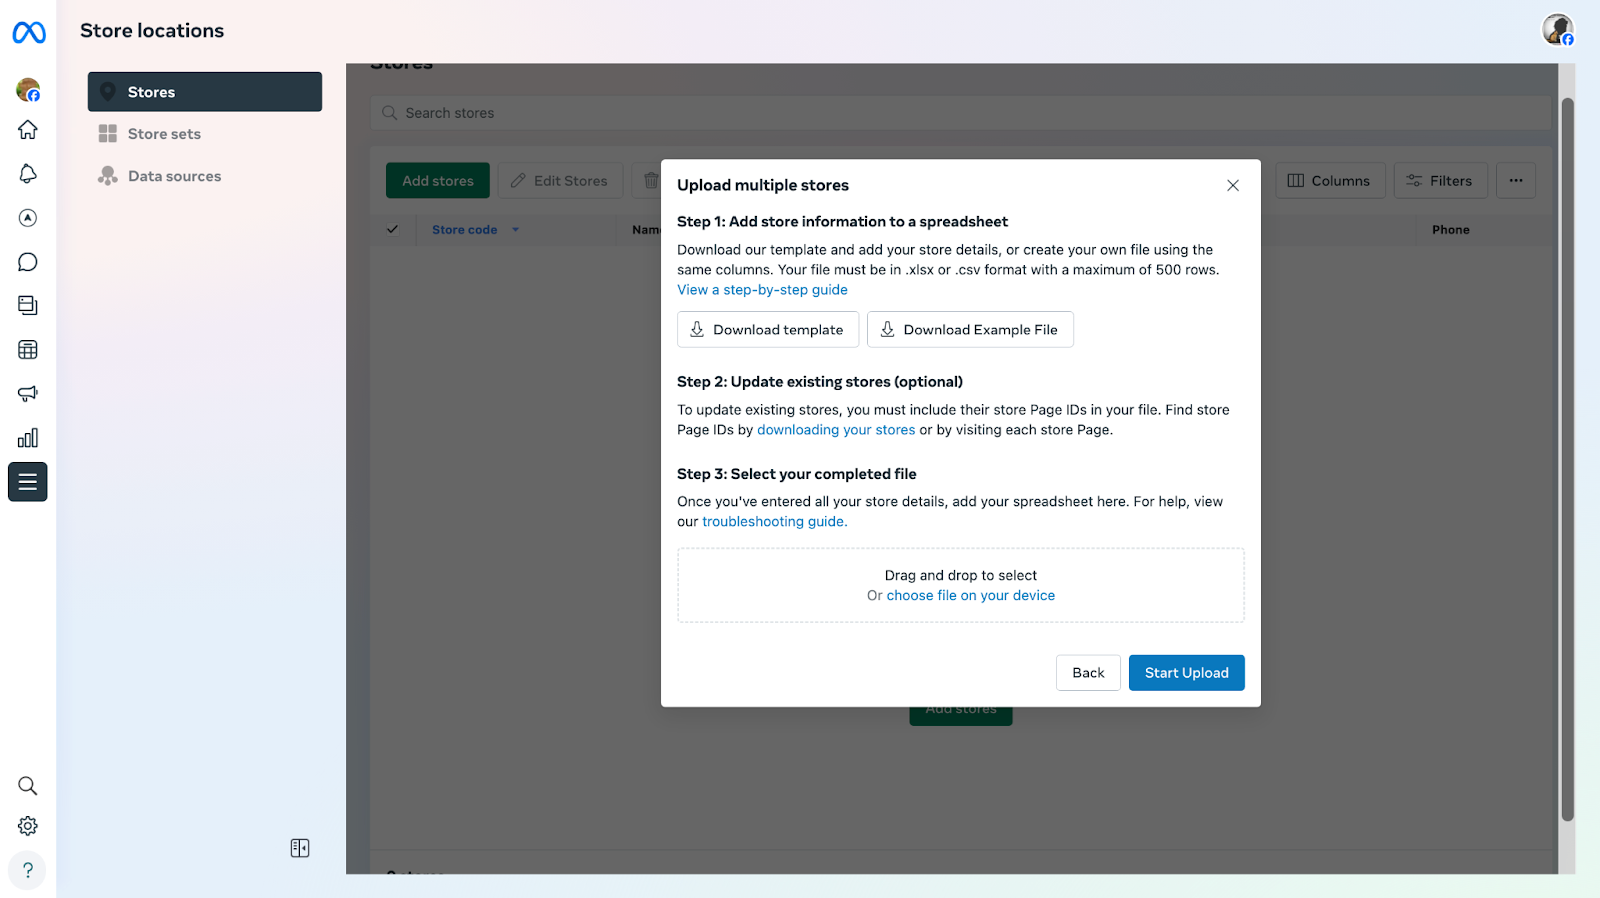
There is also an alternative, easier method for businesses with many locations. This is ideal for franchises and enterprise brands. You can upload a singular CSV file with all your locations. Simply download Facebook’s CSV template, fill it in, upload the file, and then review and confirm each location.
How to Customize Each Location Page
- Access the Individual Location Pages
Open each location page from the Locations dashboard.
- Verify All Location Info
Meta sometimes autofills location info incorrectly. Double-check address, phone number, hours, website link, category, and services.
- Add Visual Elements for Each Location
Each store should feel like its own storefront. That’s why you should add a cover photo (preferably location-specific), a profile photo (logo or location-specific), and additional photos like store interiors, staff, signage, events, etc.
- Complete Your Location Profile
Update your profile with all relevant contact information, including your business name, phone number, and website. Add local staff or manager details, amenities such as parking or wheelchair access, location-specific services, and any important store-specific notes.
Also Read: Local Listing Management Guide to Improve Your Ranking
How to Manage Content Across Multiple Stores
One of the strongest features of Facebook Locations is centralized content management. You can control this through the Content Sharing Settings. Go to your Location Page Settings, and from there you can manage how content is distributed across all locations.
Now, choose one of the following:
- Always publish content across all location pages
With this option, posts from the main page are automatically duplicated across all location pages. It works best for brands that use consistent messaging.
- Only show on location pages that don't have their own posts
The main page fills in the gaps, making this approach ideal for brands that want a balance of local and corporate messaging.
- Never publish content across more than one location
No auto-sharing here. This is used by franchises or stores with unique promotions.
How to Remove a Store Location
When a store shuts down, you can quickly take its location offline. Go to Stores, select the location, and choose Unpublish or Delete.
Unpublish hides the store from the public but retains all data internally. Delete permanently removes the page along with its entire history.
Conclusion
Facebook Locations puts you in full control of your brand on Facebook while supercharging local visibility. It streamlines posting across multiple stores, saving time and ensuring consistency.
This guide shows you exactly how to set up and manage multiple Facebook locations with ease. If you want to manage your Facebook locations alongside all your other online listings, Synup’s listing management tool offers a powerful solution for centralized multi-location management.
Also Explore: Top 8 White Label Local Listing Management Software