
Set agency branding
How do I set branding for the portal, scan tool, and review invites?
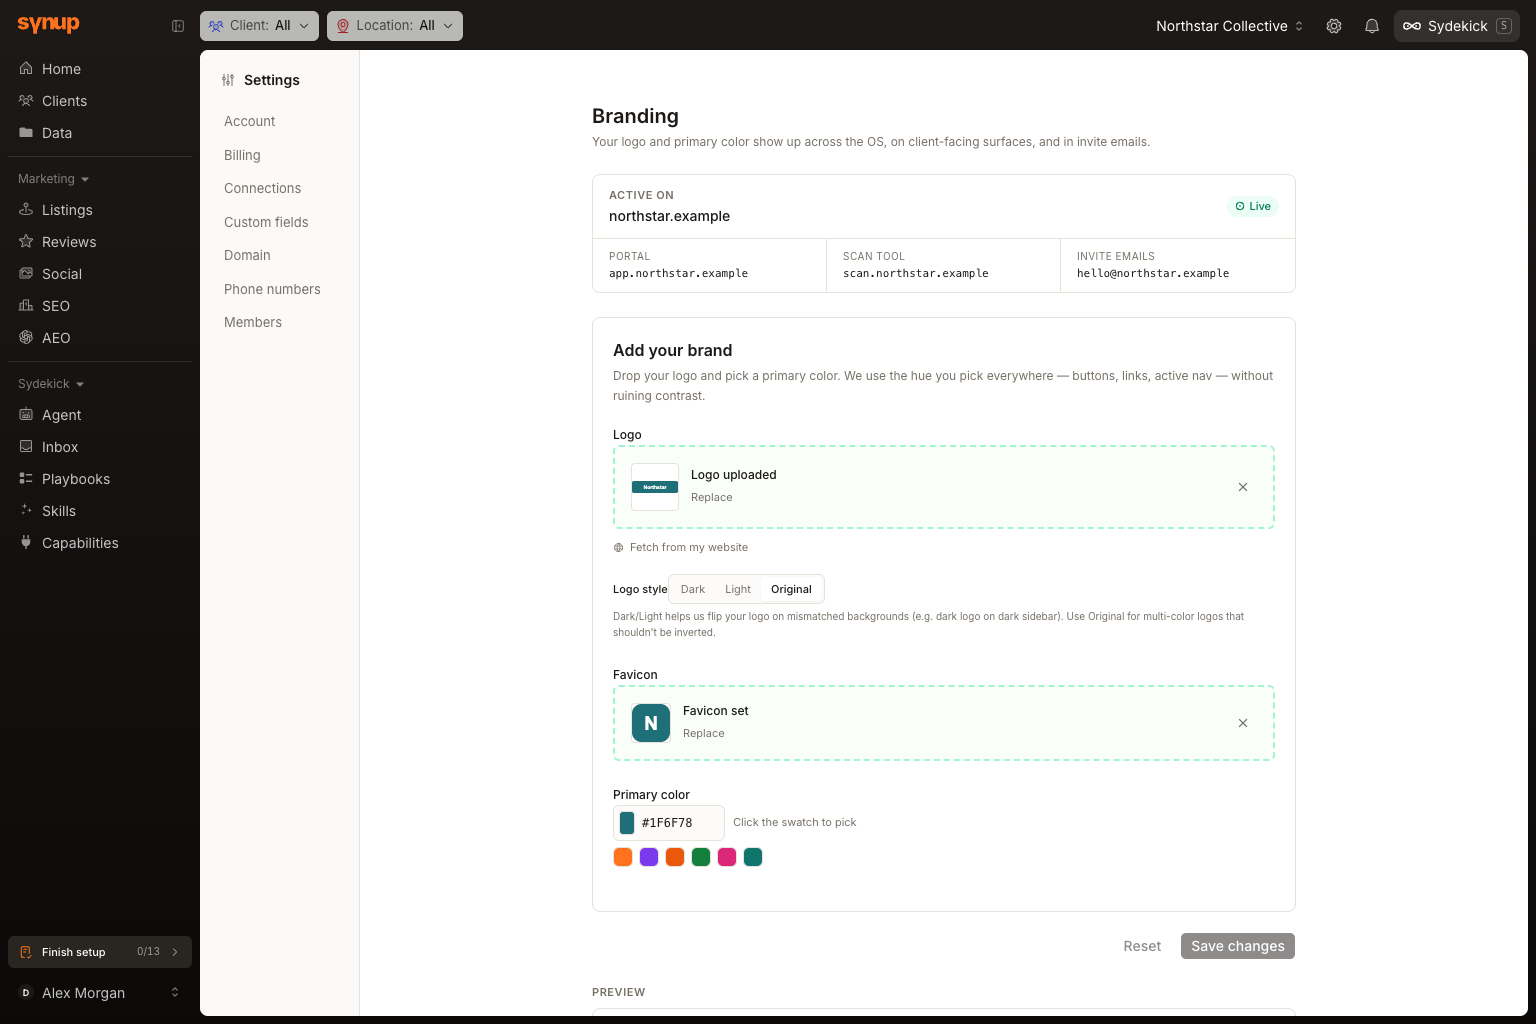
Open Finish setup and choose the branding task to set the agency logo, favicon and primary color. You can fetch assets from the agency website or upload them, preview the color treatment, and save the result. The Branding page also shows whether the identity is using a branded domain or Synup's default addresses.
Key facts
| Where it lives | Finish setup → the branding task |
| What you need first | White-label access and approved agency brand assets |
| What it changes | The agency identity shown in Synup OS, client-facing surfaces and invite emails |
Why this matters
The same saved identity feeds several surfaces, so one careless change can make the portal, scan tool and email presentation disagree. The preview lets you check the primary color and logo treatment before saving.
Steps
Open Finish setup, then choose the task for adding your brand.
Under Logo, upload a PNG or SVG under 500 KB. You can also select Fetch from my website to look for both a logo and favicon.
If you uploaded a logo, choose Dark, Light or Original under Logo style. Use Original for a multicolor logo that should not be inverted.
Add a 32×32 or 64×64 PNG favicon under 128 KB.
Enter the agency's hex value under Primary color or use the color picker.
Review Preview and the Active on panel. The panel identifies the portal, scan tool and invite-email addresses that will use this brand.
Select Save changes. Wait for Saved before leaving the page.
What you'll see when it's done
- Saved appears beside the action controls.
- The preview uses the selected primary color for buttons and links.
- The Synup shell refreshes its saved logo, color and favicon without a page reload.
Watch out for
Questions people ask
What should I check before I begin?
Use final, approved image files and confirm the workspace has white-label access. A logo can be up to 500 KB, while the favicon must be a PNG under 128 KB.
How will I know the workflow is complete?
The action area shows Saved, and the preview and Synup shell use the saved identity. If the Active on panel says No branded domain yet, configure the domain separately.
Next
Configure the customer-facing addresses in the branded-domain guide.